
1. Why Add Basic Auth to a Static Cloudflare Page?
As a remote software developer, I know how we frequently need to access and make tools to make our work easier, and how important it is to share this with our colleagues, however I also sometimes don’t want to share these with the entire world, and the dreaded AI scrapers. It’s also extremely convenient for sites like this, where it was created using a CI pipeline, but I don’t want it to be accessible until it was complete, hence the need for basic auth.
2. What You’ll Need Before Getting Started
- A git repository
- A cloudflare account, with workers enabled
- An IDE and Website
3. Creating the Functions Folder in Your Static Project
The way this script works is using a tool in Cloudflare called Cloudflare Functions which allows a serverless site to run with middleware. To set this up, in the root folder of your repository create a /functions folder, which will be automatically picked up by Cloudflare when deployed.
4. Adding Middleware to Protect Specific Routes
After making the functions folder, you can make an _middleware.js file, which basically applies the code to the entirety of the website (don’t worry we will add specifc paths later!)
5. Implementing Basic Auth in Cloudflare Pages
This code should then be added to your _middleware.js file.
export async function onRequest(context) {
  const USERNAME = context.env.AUTH_USER || "admin";
  const PASSWORD = context.env.AUTH_PASS || "secret";

  const url = new URL(context.request.url);
    if (!authHeader || !checkAuth(authHeader, USERNAME, PASSWORD)) {
      return new Response("Authentication required", {
        status: 401,
        headers: {
          "WWW-Authenticate": 'Basic realm="Protected Area"',
        },
      });
    }
  }

  return context.next();
}

function checkAuth(header, username, password) {
  const encoded = header.replace("Basic ", "");
  const decoded = atob(encoded);
  const [user, pass] = decoded.split(":");
  return user === username && pass === password;
}
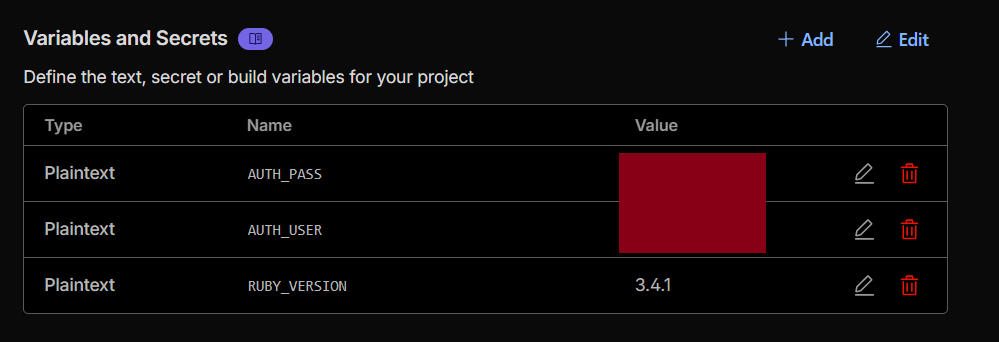
In your Cloudflare Page you should then add in two env variables, one for the username with the name as AUTH_USER and the password should also be added in as AUTH_PASS.
6. Protect specific endpoints
To protect a specifc endpoint like /admin you must update your _middleware.js to contain this:
export async function onRequest(context) {
  const USERNAME = context.env.AUTH_USER || "admin";
  const PASSWORD = context.env.AUTH_PASS || "secret";

  const url = new URL(context.request.url);

  // Only protect /admin and subpaths
  if (url.pathname.startsWith("/admin")) {
    const authHeader = context.request.headers.get("Authorization");

    if (!authHeader || !checkAuth(authHeader, USERNAME, PASSWORD)) {
      return new Response("Authentication required", {
        status: 401,
        headers: {
          "WWW-Authenticate": 'Basic realm="Protected Area"',
        },
      });
    }
  }

  return context.next();
}

function checkAuth(header, username, password) {
  const encoded = header.replace("Basic ", "");
  const decoded = atob(encoded);
  const [user, pass] = decoded.split(":");
  return user === username && pass === password;
}
7. Final Thoughts
I hope this helped, and if you have any questions about it or need a hand don’t hesitate to email blog@bizbazboz.uk for assitance!